Halo , kali ini saya akan memberikan tutorial cara membuat ikat pinggang wanita yang terbuat dari mutiara yang cara …
source
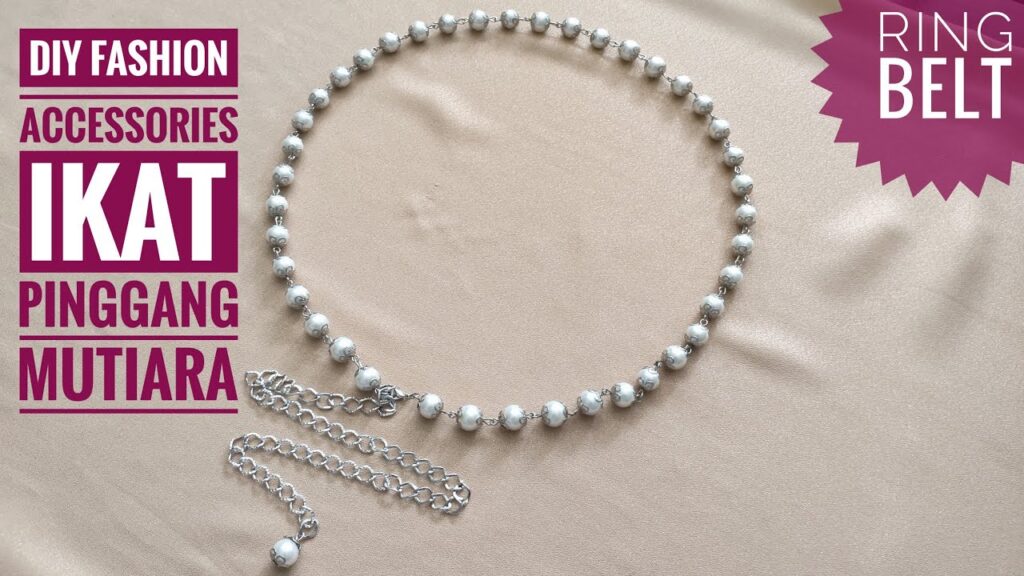
DIY Fashion Accessories: Wanita Ikat Pinggang Mutiara (Pearl Belt) & Ringbelt
In the world of fashion, accessories have the power to transform any outfit from ordinary to extraordinary. One accessory that has seen a surge in popularity is the pearl belt, or in Indonesian, ikat pinggang mutiara. Alongside it, the ringbelt, gesper, and sabuk rantai have made waves in the fashion scene. This article will guide you through creating your very own stylish pearl belt and ringbelt, making your DIY fashion journey as enjoyable as it is rewarding.
Why Choose DIY?
Creating your own accessories offers many benefits:
- Customization: You can tailor the design, length, and embellishments to fit your personal style.
- Cost-Effective: DIY projects often save money compared to purchasing high-end accessories.
- Unique Fashion Statement: A homemade accessory ensures that you stand out with a one-of-a-kind piece.
Materials You’ll Need
For the Pearl Belt:
- Pearls: Choose faux pearls in various sizes for a layered look.
- Belt Base: Use a satin ribbon or a plain fabric belt as the base.
- Strong Thread: Ensure you have a durable thread for sewing.
- Needle: A sewing needle suitable for fabric.
- Scissors: For cutting the ribbon or fabric.
- Glue Gun (Optional): For securing pearls if you prefer not to sew.
For the Ringbelt:
- Metal Rings: Silver or gold-toned metal rings (available at craft stores).
- Chain: A sturdy chain to attach the rings.
- Clasp: A strong clasp to secure the ends of the chain.
- Pliers: For bending and securing the rings and chain.
- Glimmering Embellishments (Optional): Gems or charms to add an extra flair.
Step-by-Step Guide: Making a Pearl Belt
Step 1: Prepare the Base
- Cut the satin ribbon to your desired length, ensuring it fits comfortably around your waist.
Step 2: Arrange the Pearls
- Lay the pearls out on the ribbon to determine their placement. Consider different sizes and patterns for a dynamic look.
Step 3: Secure the Pearls
- Thread the needle with strong thread and start sewing the pearls onto the ribbon. If you prefer, you can use a glue gun to attach the pearls for a quicker process.
Step 4: Final Touches
- Once all the pearls are secured, trim any excess ribbon and finish the ends to avoid fraying.
Step-by-Step Guide: Making a Ringbelt
Step 1: Design Your Pattern
- Plan how you want your rings arranged – tightly woven or looser for a more bohemian feel.
Step 2: Attach the Rings
- Using pliers, connect the rings together. Ensure they are securely fastened so they won’t come apart during wear.
Step 3: Add the Chain
- To form the belt, attach your chain to each end of the ring assembly, using the pliers.
Step 4: Secure the Clasp
- Attach the clasp at one end of the chain to make it easy to wear and remove.
Styling Your DIY Accessories
Once your pearl belt and ringbelt are finished, it’s time to showcase them!
Pairing Ideas:
- Casual Chic: Wear the pearl belt over a flowy dress or a fitted top with high-waisted jeans.
- Boho Vibes: Use the ringbelt with a maxi skirt or layered outfits for a laid-back, stylish look.
- Evening Elegance: Both belts can enhance a simple evening dress, adding a touch of sophistication.
Conclusion
Creating your own fashion accessories like the pearl belt and ringbelt not only enhances your wardrobe but also allows you to express your creativity and individuality. With some basic materials and a little time, you can craft stunning pieces that are uniquely yours. So gather your supplies, unleash your creativity, and enjoy the art of DIY fashion!