Make a Cowrie Shell Necklace With Me
Cowrie shells have long been celebrated for their beauty and cultural significance. They are often associated with femininity, fertility, and prosperity. Making a cowrie shell necklace is not only a fun DIY project but also an opportunity to create a unique piece of jewelry that embodies these rich traditions. Let’s dive into this creative journey together!
What You’ll Need
Before we start crafting, gather the following materials:
- Cowrie shells (available at craft stores or online)
- String or cord (nylon, cotton, or leather work well)
- Beads (optional, for added flair)
- Scissors
- Glue (optional, if your design requires)
- Measuring tape
- Clasp (if you want a more polished finish)
Step-by-Step Guide
Step 1: Design Your Necklace
Before you dive into assembling, sketch out your design. Think about how many cowrie shells you want to use and if you want to incorporate beads. A simple strand of cowrie shells can make a stunning statement, or you could create a more intricate pattern by adding colorful beads in between.
Step 2: Measure Your Cord
Decide how long you want your necklace to be. A standard length is about 18-24 inches, but you can adjust according to your preference. Once you have the desired length, cut your string or cord, making sure to leave a little excess for knots.
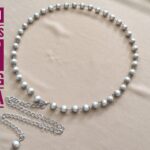
Step 3: String the Cowrie Shells
Begin threading the cowrie shells onto the cord. If they have small holes, string them directly. For shells without holes, you can glue them onto a bead or a small piece of fabric to secure them. Leave some space at both ends for knots or clasps.
Step 4: Add Beads (Optional)
If you chose to include beads, now is the time to intersperse them between the cowrie shells. This adds color and texture to your necklace, so feel free to get creative!
Step 5: Secure Your Necklace
Once you’re satisfied with the arrangement, tie a sturdy knot at each end of the necklace to secure the shells and beads in place. If you’re using a clasp, follow the instructions that come with it to attach it to both ends.
Step 6: Finishing Touches
Trim any excess string and double-check that everything is secure. If you’re using glue, allow it to dry completely before wearing your necklace.
Step 7: Show It Off!
Wear your stunning cowrie shell necklace with pride! Pair it with a simple top or a flowing dress for a bohemian look. This piece is perfect for festivals, beach outings, or even casual everyday wear.
Fashion and Accessories Tips
- Layering: Consider wearing your cowrie shell necklace with other necklaces of varying lengths to create a layered look.
- Color Coordination: Choose outfits that complement the colors of your beads for a polished appearance.
- Gifting: Handcrafted jewelry always makes for a thoughtful gift. Consider making a matching set for friends or family!
Final Thoughts
Crafting a cowrie shell necklace is a delightful way to express your creativity while embracing a piece of cultural history. The beauty of DIY accessories is that they can be tailored to your personal style. So grab your materials and let’s make something beautiful together!
Happy crafting! #cowrieshell #necklace #howto #fashion #accessories #jewellery