7 Easy Steps to Master Spider Girl Face Painting: Beginner-Friendly Ideas You’ll Love!
Materials I used: Pink Tag face paint: https://amzn.to/3snpuP6 White Mehron Paradise face paint: https://amzn.to/3Myr33I Fusion …
source
Easy Spider Girl Face Painting: A Fun Guide for Beginners
Face painting is a delightful way to enhance any festive occasion, whether it’s a birthday party, a Halloween celebration, or simply a weekend of fun. One of the popular designs that never goes out of style is the Spider Girl face paint. This charming and slightly spooky look is perfect for children who adore superheroes and arachnids alike! If you’re new to face painting, fear not! This article will guide you through the process, offering step-by-step instructions, tips, and inspiration for creating an easy Spider Girl design.
Materials You Will Need
Before you get started, make sure to gather the following materials:
- Face Paint: Look for water-based face paints that are safe for skin. Popular colors for the Spider Girl look include light pink, black, white, and red.
- Brushes and Sponges: A flat brush for larger areas, a fine-tipped brush for details, and a makeup sponge for blending.
- Water: For diluting the paint as needed.
- Paper Towels: To wipe off excess paint and clean your brushes.
- Face Paint Setting Spray (Optional): To help your design stay in place throughout the day.
- Glitter (Optional): For some added sparkle!
Step-by-Step Instructions
Step 1: Prepare the Face
Start with a clean, dry face. If you’ve got a makeup sponge, you can apply a light base of skin-colored face paint to even out the complexion. This creates a nice canvas for your design. If your Spider Girl is more of a superhero, consider using light pink to give that cheerful superhero vibe.
Step 2: Outline the Spider Web
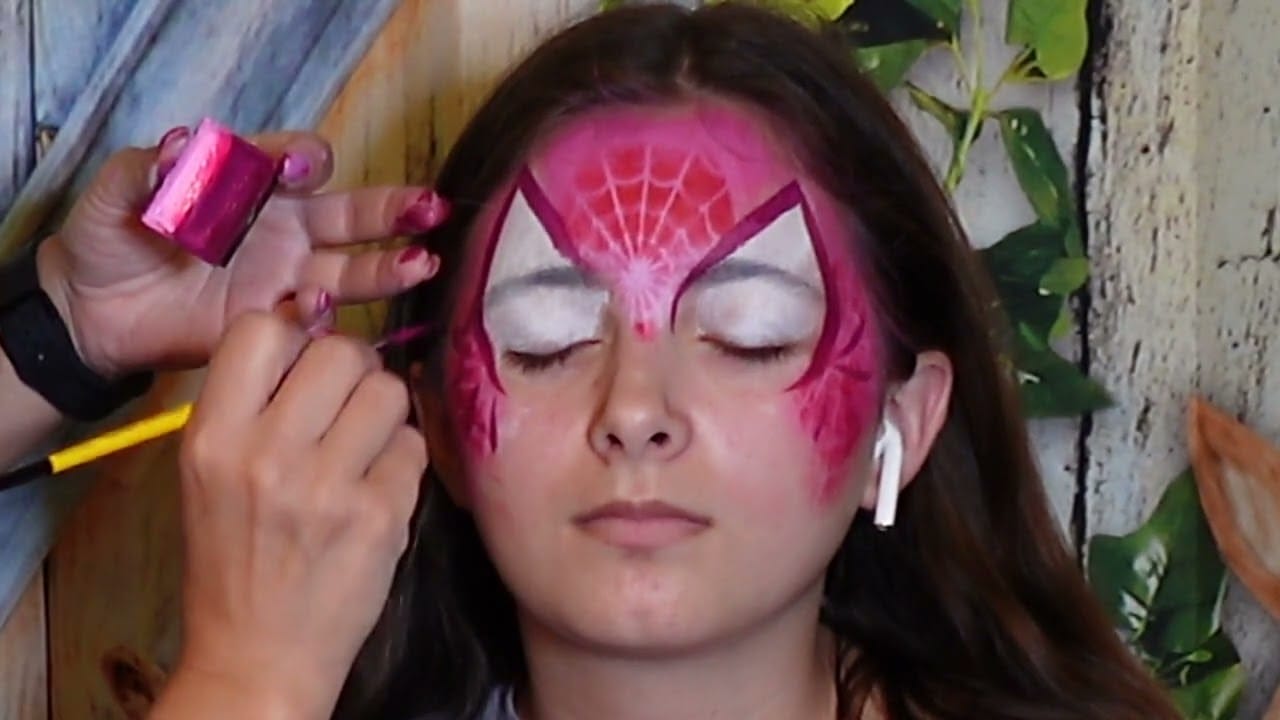
Using a fine-tipped brush and black face paint, draw a spider web across one cheek or forehead. Start from a central point and create lines radiating outwards, resembling spokes of a wheel. Then, connect these lines with curved shapes to form a web.
Step 3: Add the Spider
At the center of the web, you can add a simple spider shape. Draw an oval body with eight legs extending outwards. Use black paint to make the spider stand out, and feel free to add a bit of personality by creating large eyes with white paint.
Step 4: Create the Spider Girl Look
Now, let’s transform this web into a Spider Girl! On the other cheek, add bright, rosy pink accents resembling a mask or superhero makeup. Use a flat brush to apply this color in an arc over the eyes, extending to the temples.
Step 5: Detail the Eyes and Mouth
For the eyes, use black face paint to darken the eyelids slightly, giving a striking effect that contrasts with the pink. Add some white dots in the corners of the eyes for an innocent yet mischievous touch. For the mouth, a smile with slightly darker red or pink helps complete the playful look.
Step 6: Add Extra Flourishes
To spark things up, you can add glitter to the web or around the eyes for a sparkle effect. Think of creating little stars or speckles around the face to suggest magic and whimsy.
Step 7: Set the Paint
For lasting durability, let the face paint dry for a few minutes, then spray it lightly with a face paint setting spray. This will ensure your design withstands the fun of the day.
Tips for Beginners
- Practice: Before painting on a child’s face, practice on a paper towel or your own hand to get a feel for the brushwork and colors.
- Stay Simple: Don’t be afraid to simplify the design if necessary. A less complex spider web or fewer details can still be striking and fun.
- Use References: Have a reference image nearby to guide you. This can help you visualize the design while you paint.
- Involve the Kids: Let the kids choose their own colors or small designs, allowing them to express their creativity.
Conclusion
Creating an Easy Spider Girl face painting design is a fun and rewarding experience, especially for beginners. With just a few materials and some creativity, you can transform a simple face into a dazzling character that kids will love. So gather your supplies, unleash your artistic flair, and watch as the magic unfolds with each brush stroke. Happy painting!


Post Comment