7 Powerful Tips for Installing Stunning Bathroom and Kitchen Tiles: Essential Designs and Marble Ideas for 2021!
bathroom, bathroom floor, bathroom #floortiles installation, #bathroomtiles, bathroom #tiles design, bathroom #tilesinstallation, …
source
How to Install Bathroom and Kitchen Floor and Wall Tiles: Trends and Techniques for 2021
Installing tiles in your bathroom or kitchen can elevate the aesthetic appeal and functionality of the space. With designs continually evolving, 2021 brought forth exciting trends and installation techniques. Here’s a comprehensive guide on how to install these tiles effectively.
Choosing Your Tiles: Trends for 2021
Before starting the installation process, selecting the right tiles is crucial. Here are some trending options:
1. Marble and Marble-Look Tiles
Marble remains a timeless choice, bringing elegance and luxury to both bathrooms and kitchens. In 2021, marble-look porcelain tiles gained popularity for their durability and lower maintenance.
2. Large Format Tiles
Large tiles can create a more spacious feel, especially in smaller rooms. These tiles reduce grout lines, making cleaning easier.
3. Geometric Patterns
Geometric tile designs, whether in floor or wall applications, add a modern touch. These can be used as accents or throughout the room for a bold statement.
4. Natural Stone
Natural stone, including slate and quartzite, adds a rustic element. These textures are perfect for creating a warm and inviting atmosphere.
Tools and Materials Needed
For a successful installation, gather the following tools and materials:
- Tiles (floor and wall)
- Tile adhesive
- Grout
- Tile cutter
- Trowel
- Level
- Spacer (1/16 inch or more, depending on tile size)
- Sponge and bucket (for cleaning)
- Sealer (for porous tiles)
- Safety gear (gloves, goggles)
Preparing the Surface
1. Clean and Level the Surface
Ensure that the floor or wall is clean, dry, and free of debris. A level surface is essential for a successful tile installation.
2. Plan Your Layout
Before applying any adhesive, lay out the tiles in the desired pattern. This helps visualize the final outcome and identify any necessary cuts.
Installation Steps
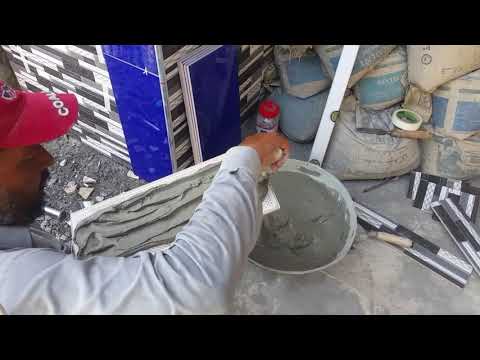
Step 1: Apply Tile Adhesive
Using a notched trowel, spread tile adhesive on the floor or wall. Start at one corner and work your way outward, applying enough adhesive for a few tiles at a time.
Step 2: Place Tiles
Begin placing tiles, pressing each one firmly into the adhesive. Use spacers to maintain consistent gaps between tiles, allowing for grout later.
Step 3: Cut Tiles as Necessary
For edges and corners, measure and cut tiles using a tile cutter. It’s essential to wear safety goggles during this process.
Step 4: Allow Adhesive to Set
Refer to the manufacturer’s instructions regarding the setting time of the adhesive before proceeding to grout.
Step 5: Grout the Tiles
Once the adhesive has cured, remove the spacers and fill the gaps with grout. Use a float to spread the grout and wipe away excess with a damp sponge. Ensure that the grout is smoothed out within the joints.
Step 6: Seal the Grout
After the grout has cured (usually 24 to 48 hours), apply a sealer to protect it from stains and moisture.
Maintenance Tips
- Regular Cleaning: Use a mild cleaner to maintain your tiles. Avoid abrasive cleaners that can damage finishes.
- Avoid Excessive Moisture: For bathrooms, ensure proper ventilation to prevent mold growth around tiles.
- Check for Damage: Regularly inspect for any cracked tiles or grout and address issues promptly.
Conclusion
The installation of bathroom and kitchen tiles can transform your space into a stylish and functional area. With the right tools, materials, and techniques, you can achieve a professional finish that reflects the latest trends of 2021. Whether you opt for luxurious marble or vibrant geometric patterns, the key is to plan thoroughly and execute carefully for beautiful results.


Post Comment