Hey there, parents! Are you looking for the perfect fancy dress for your little princess? Look no further than Lagan MST’s baby girl …
source
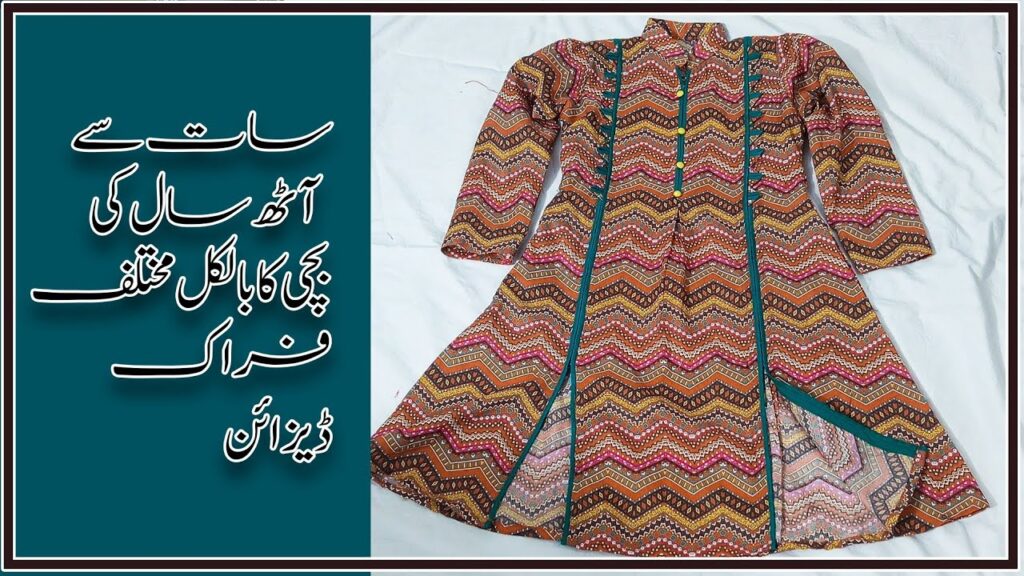
Design a Unique Casual Frock for 7 to 8-Year-Old Girls: A Full Tutorial
Creating a unique and stylish frock for 7 to 8-year-old girls can be an exciting project! With just a few materials and some sewing skills, you can create a beautiful casual frock that will make any young girl feel special. In this tutorial, we’ll walk you through the process step by step.
Materials Needed
Fabric
- Cotton fabric: Choose a lightweight, breathable cotton fabric with fun prints or patterns. A yard or two should suffice depending on the size of the frock.
Sewing Supplies
- Sewing machine
- Scissors
- Measuring tape
- Pins
- Thread (matching the fabric color)
- Buttons (optional, for decorative purposes)
- Elastic (for a comfortable fit around the waist)
Pattern
- You can create your own or use a pre-made pattern for a simple A-line or empire waist frock.
Tutorial Steps
Step 1: Choose Your Design
Decide on the style of the frock. A casual design can include elements like:
- A-line silhouette: Flattering and easy to wear.
- Short sleeves or sleeveless: Perfect for casual outings.
- Pockets: Make it functional and trendy!
Step 2: Take Measurements
Measure the child’s bust, waist, length from shoulder to knees, and the sleeve length (if applicable). This will help you determine the size of your pattern.
Step 3: Create or Cut Out the Pattern
Using your measurements, draft your pattern pieces on paper:
- Front and back bodice: Cut two pieces for each.
- Skirt: Create a wider bottom piece, ensuring it is long enough.
- Sleeves (if applicable): Cut two pieces.
After drafting, cut out the fabric pieces according to your pattern.
Step 4: Assemble the Bodice
- First, sew the front and back bodice pieces together at the side seams using a straight stitch.
- If you’re adding buttons, create buttonholes on one side of the bodice and sew on the buttons on the other side.
Step 5: Attach the Skirt
- Gather the top edge of the skirt fabric to equal the width of the bodice. You can use a long stitch to pull the fabric and create gathers.
- Pin the gathered edge to the bodice and sew them together.
Step 6: Attach Sleeves (if chosen)
- Gather the sleeves at the cap and pin them to the armhole. Sew them in place.
Step 7: Hemming
- Hem the bottom of the skirt and the sleeves by folding the edges inward and sewing. This gives a clean finish and prevents fraying.
Step 8: Waistband
- For a comfortable fit, create a casing for the elastic. Fold the waist area down and sew a straight line, leaving an opening to insert the elastic.
- Measure the elastic to fit the waist snugly but comfortably. Thread it through the casing and secure the ends. Sew the opening closed.
Final Touch: Add Decorations
Consider personalizing the frock with:
- Appliqués: Use patterned fabric to cut shapes and sew them onto the frock.
- Ribbons: Add bows or ties to the waist or sleeves.
- Pockets: Sew them onto the front or sides for added functionality.
Step 9: Final Fit Check
After completing the sewing, try the frock on the child to ensure it fits comfortably. Make any necessary adjustments, and it’s ready for them to wear!
Conclusion
Creating a casual frock for a 7 to 8-year-old girl doesn’t have to be complicated. With this step-by-step guide, you can design a unique and stylish frock that caters to her tastes. This project is not only rewarding but also a beautiful way to express creativity and give a personalized gift.
If you enjoyed this tutorial, don’t forget to subscribe for more unique designs and crafting ideas! Happy sewing!
Follow Us for More!
Stay tuned for more creative tutorials and project ideas. Join our sewing community and share your amazing creations with us through social media! #frockdesigns #subscribe