Drawing Fashion Dress Sketch Tutorial | London Show | Dress | Drawing Time #draw #pencil #sketch #sketching #howtodraw …
source
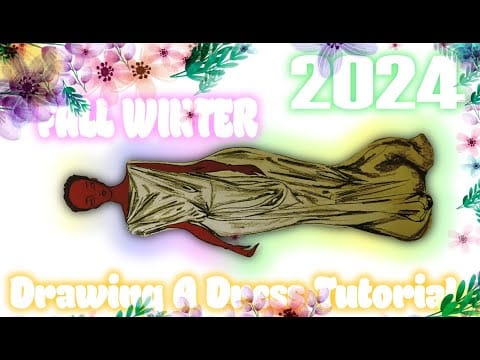
Drawing a Dress: A Sketching Tutorial for Fashion Enthusiasts
London’s fashion scene is renowned for its vibrancy and eclectic styles, making it an ultimate inspiration for aspiring designers and artists. In this tutorial, we’ll delve into the art of sketching a dress, focusing on pencil techniques that capture the essence of fashion.
Gathering Inspiration
Before picking up your pencil, immerse yourself in the world of London Fashion. Browse through magazines, explore runway shows, and visit local boutiques. Note the unique patterns, fabrics, and silhouettes that catch your eye.
Materials You’ll Need
- Pencil: A range of pencils (H, 2B, 4B) for varying line depths.
- Paper: A sketchbook or drawing pad with smooth, quality paper.
- Eraser: For adjustments and clean lines.
- Blending stump: To create smooth transitions and shading.
- Ruler: Optional, for precise measurements.
Step-by-Step Tutorial
Step 1: Outline the Figure
Begin by lightly sketching the basic outline of a fashion figure. Focus on proportion—typically, fashion sketches are elongated to emphasize height and elegance. Use simple shapes to construct the torso, waist, and hips, keeping the limbs slim.
Step 2: Adding the Dress
Start with a basic outline of the dress. Decide on the style—A-line, bodycon, or ballgown. For instance, if you’re going for an A-line dress, draw a fitted bodice and then flow the lines outwards from the waist. Keep refining the line until you have a clear shape.
Step 3: Detailing
Now it’s time to add details. Sketch the neckline, sleeves, and any embellishments like ruffles or lace. Incorporate texture by using different pencil strokes; for fabrics like silk, use smooth lines, while rougher textures can have jagged sketches.
Step 4: Shading
Use your 2B and 4B pencils for shading to give dimension to your dress. Identify where the natural light hits and create shadow accordingly. For example, if the dress has draping, shade underneath the folds to enhance realism. Blending stumps can be used here for a softer effect.
Step 5: Final Touches
Once you’re satisfied with the shape and shading, go through your sketch to clean up any stray lines with an eraser. Consider adding background elements or colors to elevate your design, though keeping it monochromatic can truly highlight your pencil work.
Tips for Improvement
- Practice Regularly: The key to mastering fashion sketches is consistency. Spend time each day drawing different styles and garments.
- Study Different Fabrics: Each texture requires a unique sketching approach. Spend time understanding how to depict different materials like denim, chiffon, and wool.
- Attend Fashion Shows: Live sketching during shows can sharpen your skills. Observe how garments move and how to capture that motion in your designs.
Conclusion
Creating a fashion sketch is not only about drawing a dress but also about expressing a unique vision and style. Through practice and dedication, your sketches can evolve, reflecting the dynamic nature of the London fashion scene. Whether you aspire to work in fashion design or simply enjoy art, this tutorial can guide you along your creative journey.
Share Your Journey
As you embark on your sketching path, consider sharing your work on social media with hashtags like #fashionshow and #fashionillustration. Engage with others in the community, seek feedback, and continuously evolve your craft. Happy sketching!

