Unleash Creativity: 10 Steps to Craft an Eye-Catching 100th Day of School Cape with Rainbow Button Magic Using Silhouette Cameo 4!
Silhouette #Cameo4 #PaperStencil #120DaysofSchool #DIY #100DayofSchool #SchoolEVentIdeas #ModPodge Needing some …
source
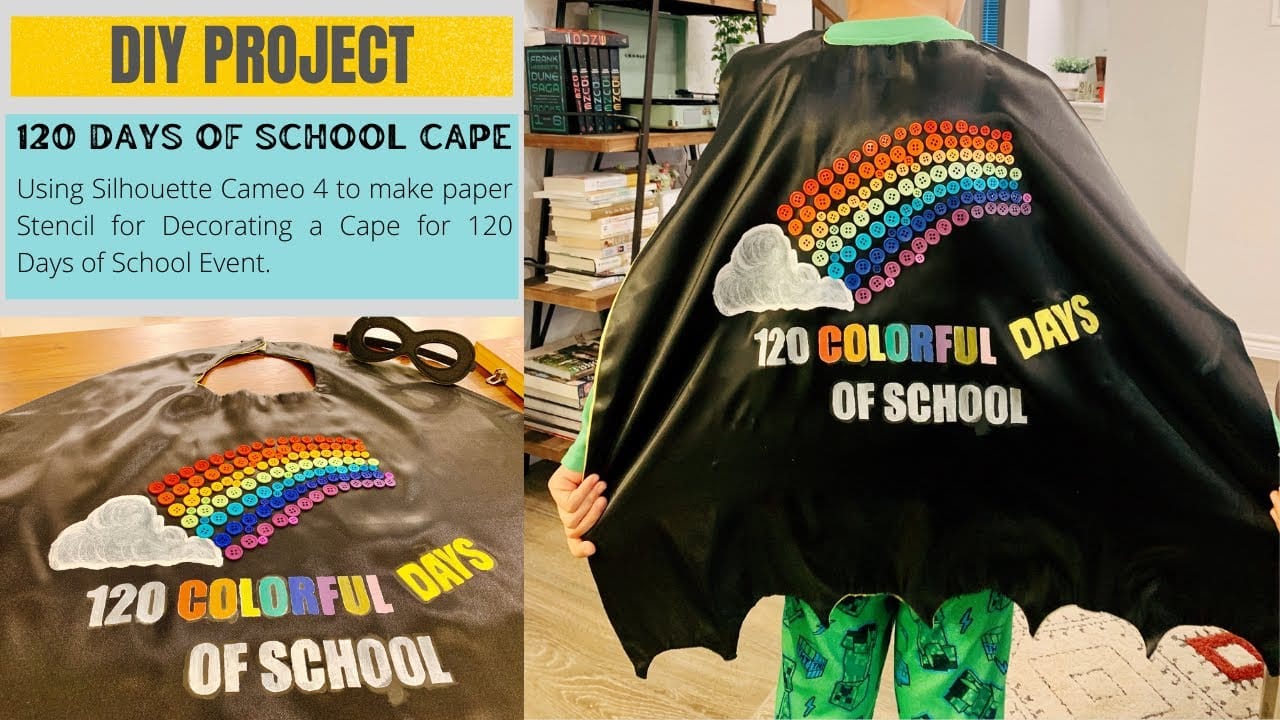
DIY Project: Rainbow Button Cape for the 100th/120th Day of School Using Silhouette Cameo 4
Celebrating milestones in school like the 100th or 120th day is a fun tradition, and what better way to commemorate the occasion than with a colorful, personalized cape? This DIY project guides you through creating a vibrant rainbow button cape using your Silhouette Cameo 4. Let’s gather some materials and get crafting!
Materials Needed
For the Cape:
- Felt or fabric (in preferred colors for the base)
- Sewing machine or fabric glue
- Scissors
- Measuring tape
For the Rainbow Buttons:
- Colorful buttons (in rainbow colors: red, orange, yellow, green, blue, indigo, violet)
- Sewing thread (matching or contrasting)
For the Design:
- Silhouette Cameo 4
- Heat transfer vinyl (HTV) or iron-on letters (optional for adding names or numbers)
- Weeding tools (for HTV)
- Standard cutting mat
Step-by-Step Instructions
Step 1: Design Your Cape
Measure and Cut the Fabric:
- Measure the desired length and width for the cape (typically around 24-36 inches in length).
- Cut a shape that fits comfortably over the shoulders, making it easy to wear.
- Create a Hem:
- Fold the edges of the fabric (about 1/4 inch) and sew or glue them down to create a neat hem.
Step 2: Prepare Your Design
Using Silhouette Studio:
- Open Silhouette Studio and design the text or numbers you want on the cape. A popular choice includes "100 Days Smarter" or "120 Days of Learning."
- Choose a fun font and size, ensuring it fits well on the cape.
Cutting the Design:
- Load the HTV into your Silhouette Cameo 4 with the shiny side down.
- Adjust the settings in Silhouette Studio for HTV and send the design to cut.
- Weeding:
- After cutting, carefully weed out the excess vinyl using weeding tools.
Step 3: Attach the Design
- Heat Application:
- Preheat your iron or heat press according to HTV instructions.
- Position your design where you want it on the cape.
- Apply heat and pressure according to the vinyl’s guidelines.
Step 4: Create the Rainbow Button Decoration
Arrange the Buttons:
- Lay out your colorful buttons in a rainbow pattern. You can create stripes or a circular design for added flair.
- Sewing the Buttons:
- Secure each button in place with matching thread. Make sure they are well attached to withstand movement.
Step 5: Finishing Touches
Try the Cape On:
- Once all elements are attached, try the cape on to ensure it fits and is comfortable.
- Personalization:
- Add a name tag or additional embellishments like glitter or fabric paint for a more personalized look.
Conclusion
This DIY rainbow button cape is a fantastic way to celebrate the 100th or 120th day of school. Not only is it bright and cheerful, but it also allows students to showcase their achievements in a fun, creative way. Plus, with the help of the Silhouette Cameo 4, you can easily customize it to fit each child’s personality. Get ready to make memories as this vibrant cape stands out on the special day!
Tips:
- Encourage kids to participate in the crafting process for an inspiring and collaborative experience.
- Consider making matching crafts or party decorations to enhance the celebration!
Enjoy your DIY adventure and happy crafting! 🌈


Post Comment